












































How to add LinkHarbor as a connector in Claude, approve access and use the tools in chat – on the web, in the app and in Claude Code.
Claude can add LinkHarbor as a custom connector. All you need is the server URL – Claude registers itself with LinkHarbor, and you confirm access once in the browser. After that, Claude can read and edit pages in your chats.
Before you start
- A LinkHarbor account (any plan, including Creator Free)
- A Claude account that allows custom connectors
- The server URL: https://dock.at-harbor.com/mcp
Whether you can add custom connectors depends on your Claude plan. In organisations, an admin may also have to allow custom connectors first.
Add the connector in Claude
- Open Claude in the browser or in the desktop app
- Go to the connectors section in the settings
- Choose the option to add a custom connector (usually “Add custom connector”)
- Enter a name, for example “LinkHarbor”
- Enter https://dock.at-harbor.com/mcp as the URL and save
- Click “Connect” on the new connector
Approve access in LinkHarbor
After you click “Connect”, a browser window with LinkHarbor opens. If you are not signed in, you sign in first (including the two-factor check if you have set it up). Then you see the consent page.
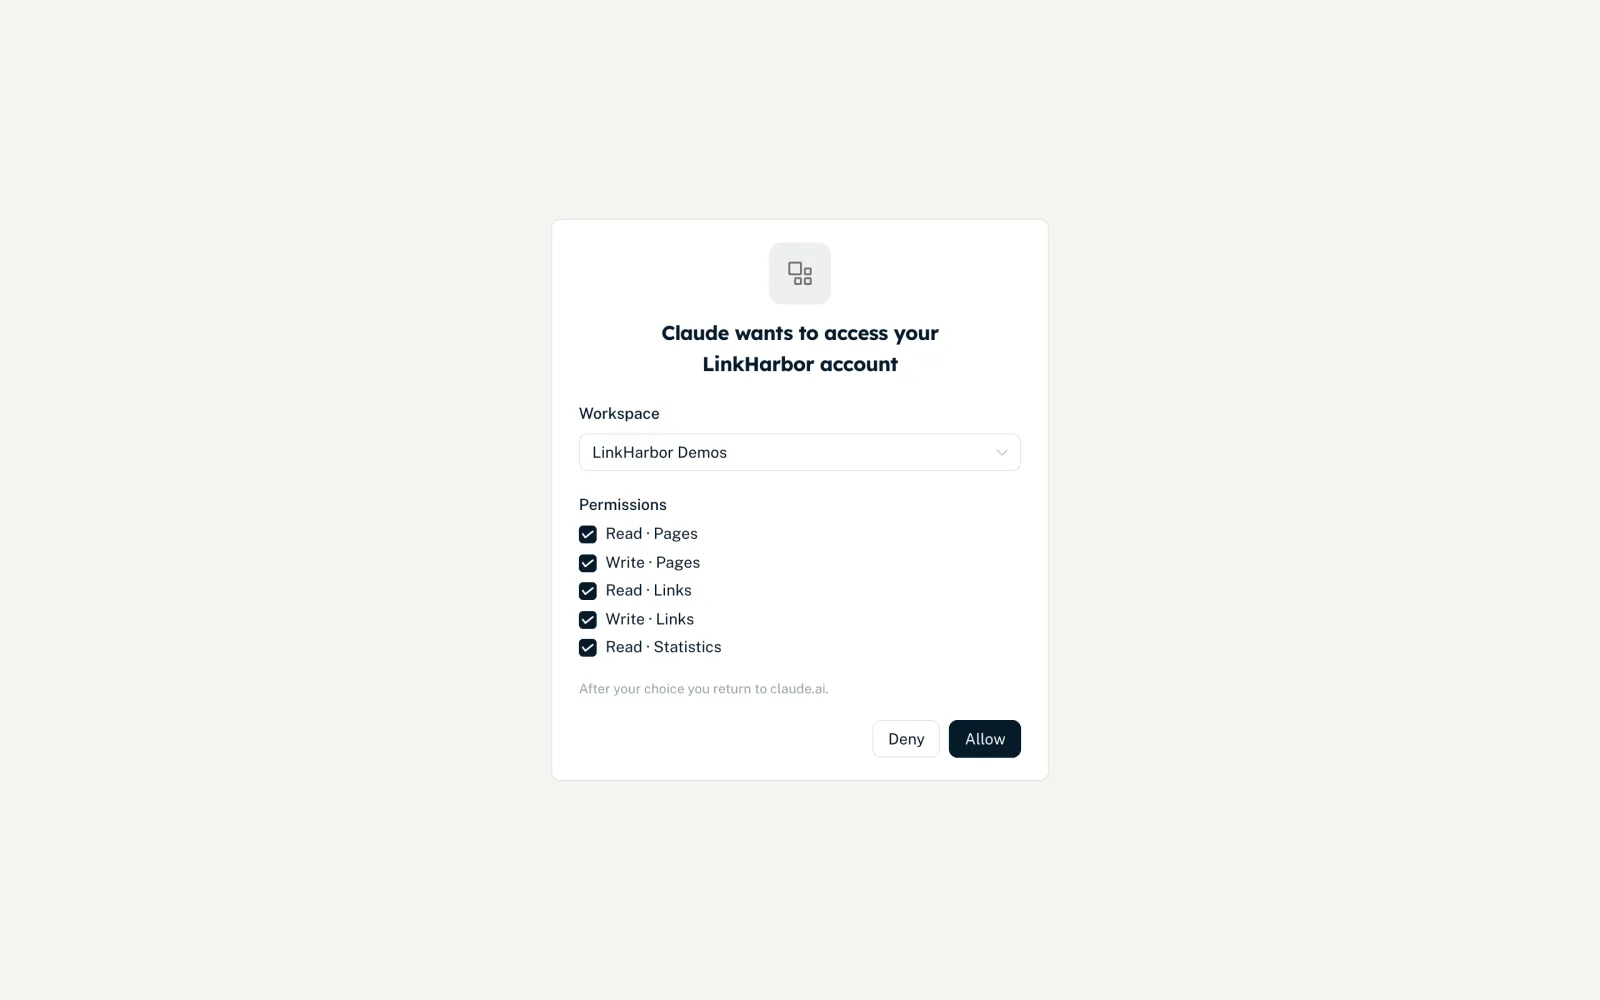
- “… wants to access your LinkHarbor account”
- Heading with the app's name. Well-known apps such as Claude in the browser or ChatGPT show no warning; a logo only appears if the app sends one.
- “Workspace”
- The workspace Claude may access. Only workspaces in which your role allows at least one of the requested permissions are offered.
- “Permissions”
- One checkbox per permission, such as “Read · Pages” or “Write · Links”. Everything your role allows is preselected. Permissions your role does not allow are greyed out.
- “Deny” / “Allow”
- “Allow” only becomes active once a workspace and at least one permission are selected. After that, you are taken back to Claude automatically.
Which boxes to tick is explained in Permissions, security and limits. For most people, the preselection is fine.
Using LinkHarbor in chat
- Start a new chat
- In the tools or connectors menu, check that LinkHarbor is switched on
- Write your request, for example “Show me my LinkHarbor pages”
- Confirm the tool calls when Claude asks
Actions such as publishing, deleting a link or changing the visibility are marked as consequential. Claude usually asks before carrying them out.
Claude Code in the terminal
In Claude Code, you add LinkHarbor as an HTTP server and then sign in:
claude mcp add --transport http linkharbor https://dock.at-harbor.com/mcpThen run the /mcp command in Claude Code and select LinkHarbor. The browser opens the consent page as described above. The exact command syntax may change with new versions of Claude Code; if in doubt, claude mcp --help will help.
If something does not work
- “This sign-in request has expired. Start again from the app”
- More than 10 minutes passed between clicking “Connect” and your decision, or the request was opened in a different LinkHarbor account. Start the connection again in Claude.
- “None of your workspaces allows the requested permissions”
- Your role does not cover the requested permissions in any workspace. Ask an admin or the owner to give you a suitable role.
- Claude does not see a tool
- The matching permission was not granted. Disconnect under “Callback & API” → “Connected apps” and connect again.
- Plan error
- The action exceeds your plan limit, such as a second page on Creator Free. The limit applies in the chat just as it does in the dashboard.
You might also find this useful
Nothing found?
Tell us what you need, and our support team will help you personally.