












































How to book Creator Pro or Agency: billing address, payment via Stripe and coupon code, and where to find invoices and your payment method.
An upgrade unlocks the features of Creator Pro or Creator Agency for your workspace. Payment runs through Stripe, and you manage invoices and your payment method in the Stripe customer portal. Only owners and admins of the workspace can change the plan.
Before you start: billing address
For the checkout, LinkHarbor needs a complete billing address with street, postcode, city and country. You add it in your profile in the “Billing address” card. There you can also enter a company name and a VAT ID.
Booking an upgrade
- Open “Upgrade plan” in the menu; the page is called “Manage plan”
- If needed, choose your currency under “Currency:”
- Choose “Monthly” or “Yearly”
- Click “Upgrade to …” on the plan card
- Enter your payment details in the Stripe checkout and complete the payment
- You land on “Upgrade successful!” and can use the new features right away
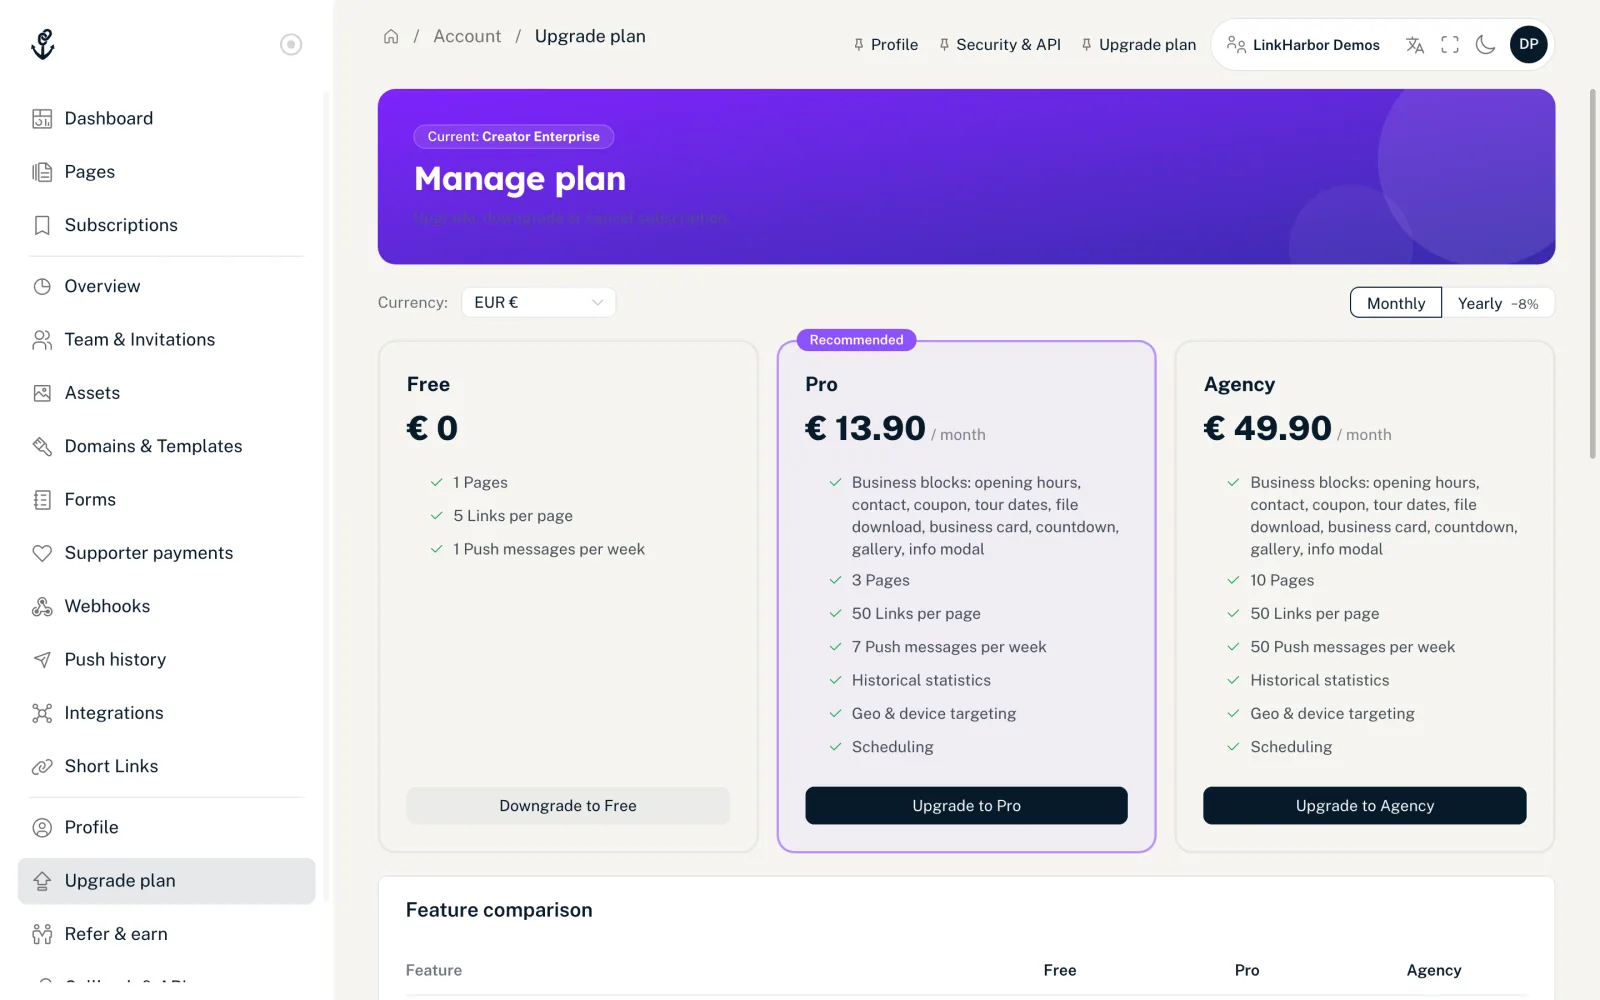
The plan cards
- “Current plan”
- Marks the plan your workspace currently has.
- “Recommended”
- Shown on Creator Pro if that would be an upgrade for you.
- Price
- Monthly price; with “Yearly”, the monthly share, with the yearly price and the saving below it.
- Tax line
- Shows how much VAT is included in the price, 19 % in Germany. With reverse charge, a corresponding note appears there.
In the Stripe checkout
- Tax is calculated automatically for your country
- Businesses can enter a VAT ID; with a valid ID, you are billed without VAT (reverse charge)
- There is a field for coupon codes, except with a referral discount
If you cancel the checkout, you see “Payment cancelled”. Nothing was charged, and you can start again with “Try again”.
Invoices and payment method
Invoices, payment method and plan changes are handled in the Stripe customer portal. There is no separate invoice list in the dashboard.
- Open “Upgrade plan”
- Click “Manage subscription & invoices →” or, at the bottom, “Go to customer portal →”
- In the customer portal you download invoices, change your payment method or switch plans
- When you come back, the dashboard shows “Settings saved”
Owners and admins see the customer portal buttons as soon as the workspace has a paid plan. Editors and viewers see the plans and prices, but with the note “Only the workspace owner and admins can change the plan.”
Frequently asked questions
Does the plan apply to my whole account?
No, to the workspace in which you book the upgrade. If you switch to another workspace in the top bar, that workspace's plan applies there.
What if the payment doesn't work?
Then Stripe shows the reason, and you can choose another payment method. What happens if a later charge fails is explained in Cancelling, downgrading and failed payments.
Is there a discount?
Paying yearly saves you around 8 %. You enter coupon codes in the Stripe checkout.
You might also find this useful
Nothing found?
Tell us what you need, and our support team will help you personally.