












































How to invite people to your workspace, manage pending invitations, accept an invitation yourself and remove members.
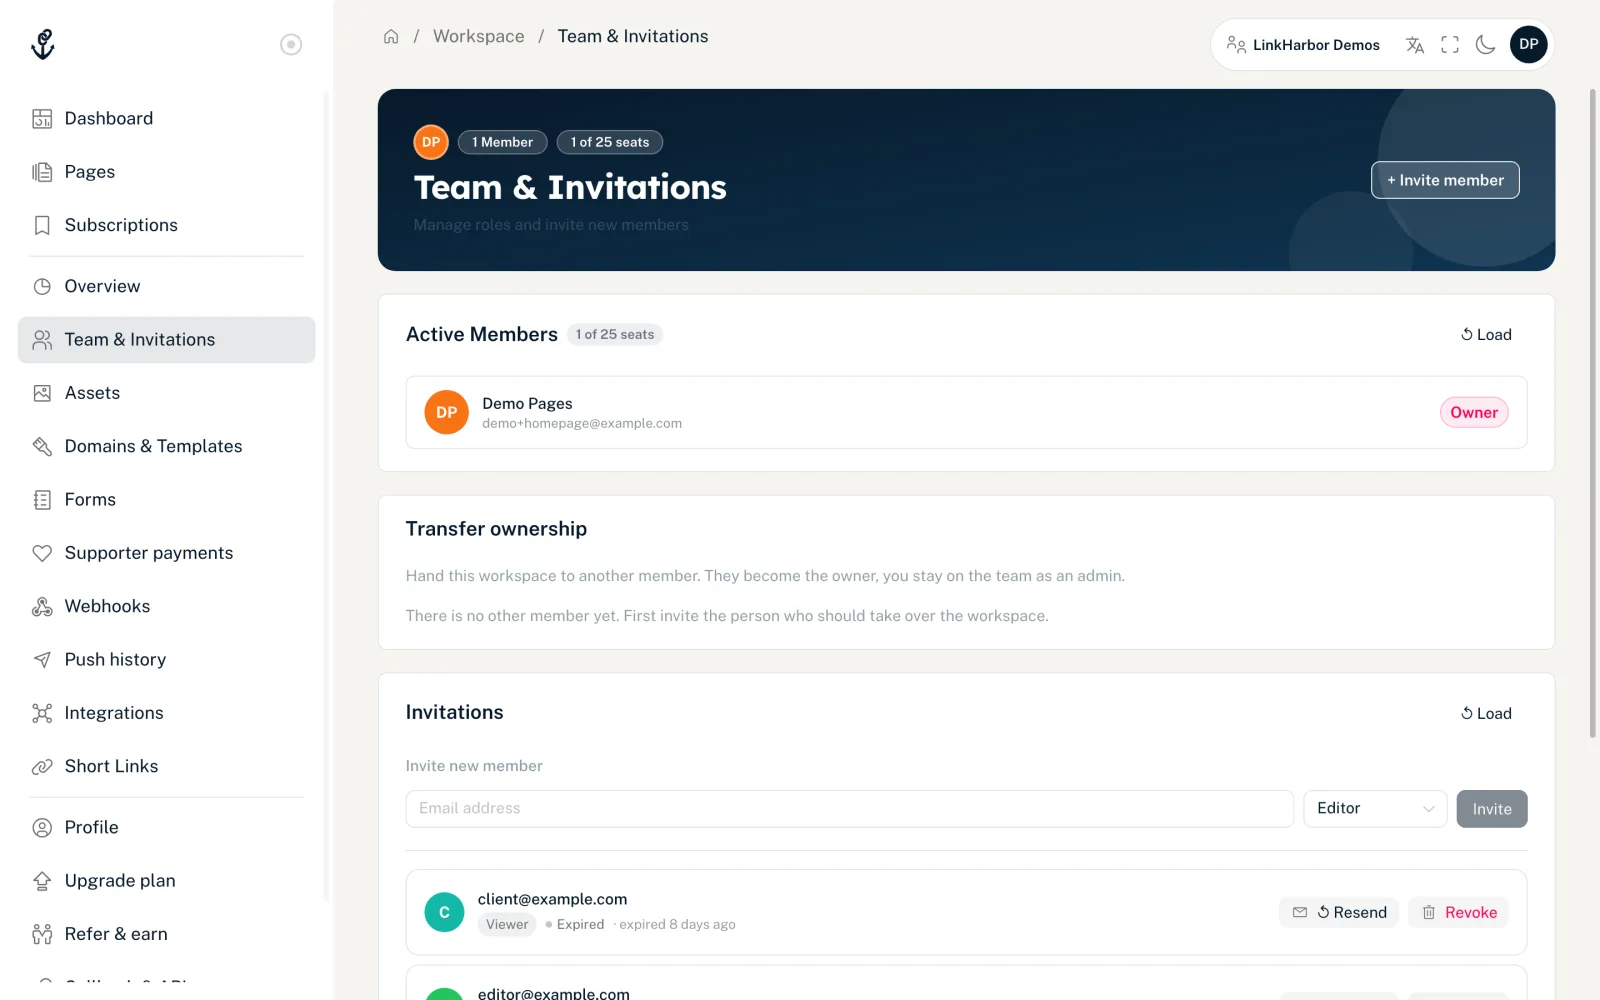
The “Team & Invitations” area is where you work with others: you invite people by e-mail, give them a role and see who has already joined. Admins and the owner can invite and remove members. Everyone else sees the member list and can redeem an invitation themselves.
How many members your plan allows
| Plan | Seats in the workspace |
|---|---|
| Creator Free | 1 |
| Creator Pro | 1 |
| Creator Agency | 5 |
| Enterprise | by agreement |
The owner takes up a seat, and pending invitations count too. On Creator Free and Creator Pro the only seat is therefore already taken, so you can invite team members from Creator Agency. At the top of the page, for example “2 of 5 seats” shows how many members have joined. Pending invitations are not included there but still take up a seat.
Invite someone
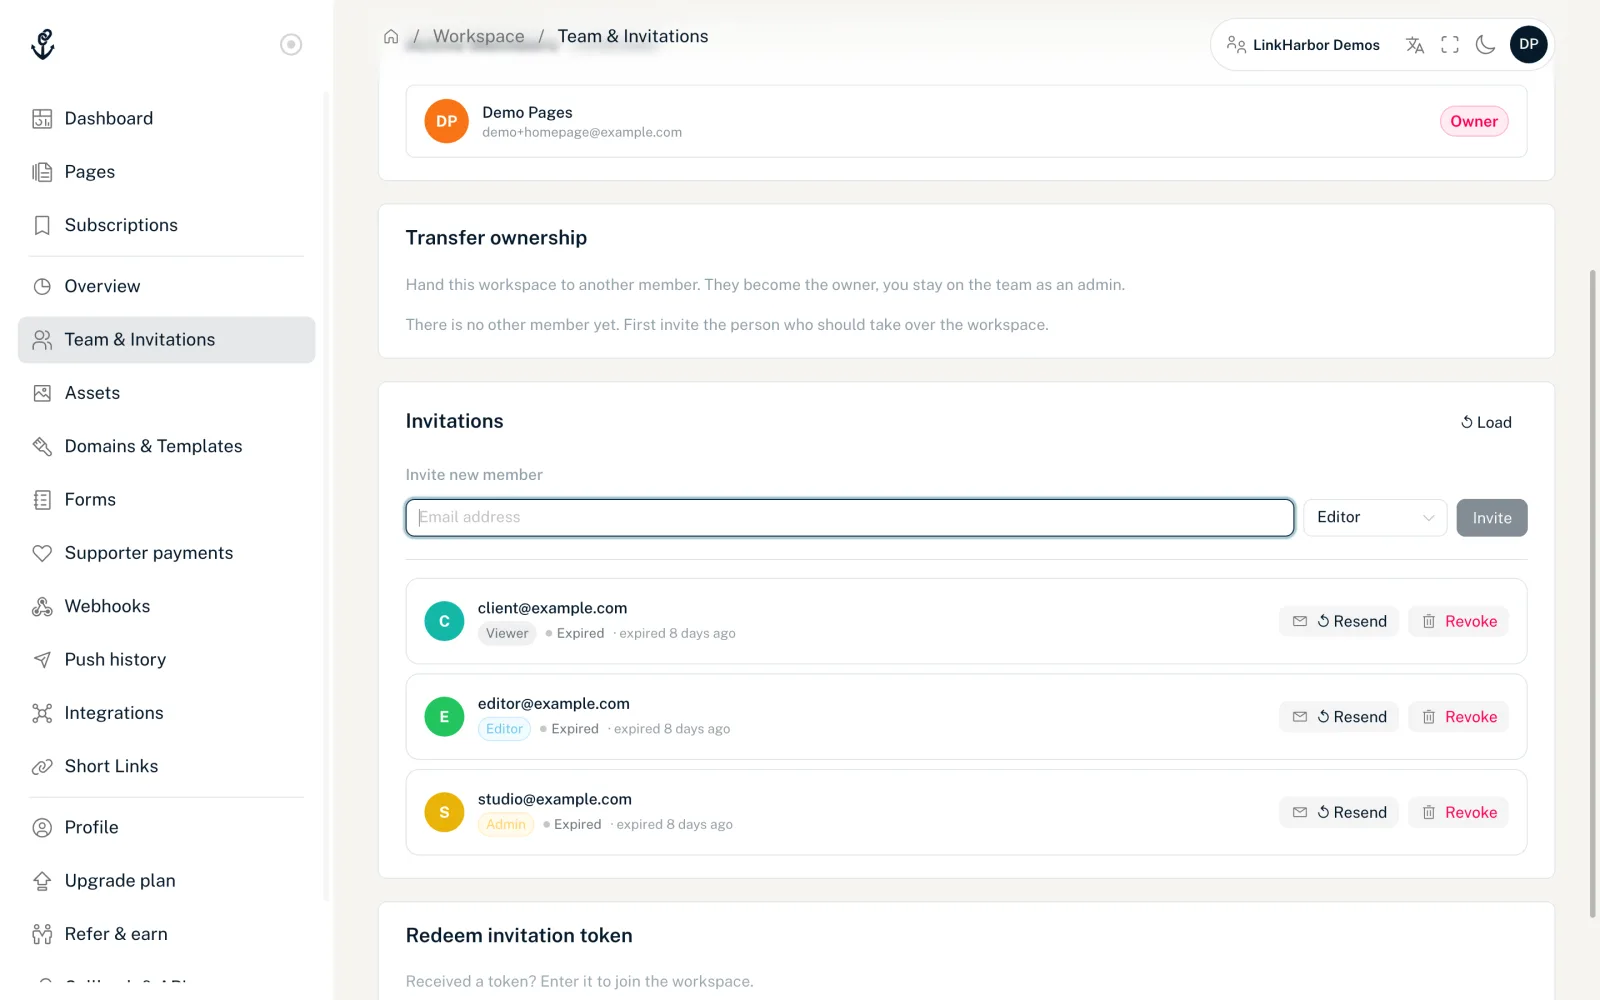
- Open “Team & Invitations” and click “+ Invite member”, or scroll to the “Invitations” card
- Under “Invite new member”, enter the person's e-mail address (at most 254 characters)
- Choose the role: Admin, Editor or Viewer; Editor is preselected
- Click “Invite”
The message “Invitation sent to …” appears. The person gets an e-mail with your name and a link to accept. The invitation is valid for 7 days. What the roles can do is in Roles and permissions.
When all seats are taken, the note “Member limit reached” replaces the form, with the “Upgrade plan” button.
When inviting does not work
| Message | Meaning |
|---|---|
| “An invitation for this email address is already pending.” | Use “↺ Resend” in the list instead of a new invitation |
| “This person is already a member of the workspace.” | The person is already on the team |
| “Member limit reached — upgrade your plan for more seats.” | All seats are taken, including by pending invitations |
| “Too many emails sent in a short time. …” | Wait a few minutes and try again |
You cannot invite yourself. We send at most 10 invitation e-mails per recipient per day.
Manage pending invitations
The “Invitations” card lists every invitation sent, with e-mail address, role and status: Pending, Accepted, Expired or Revoked. For open invitations you see when they expire.
- “↺ Resend”
- For pending and expired invitations. The person gets a new e-mail with a new link, and the 7-day period starts again. The old link then stops working.
- “Revoke”
- Withdraws the invitation. The link stops working and the seat becomes free again.
Accept an invitation
- Open the link in the invitation e-mail
- Sign in with exactly the e-mail address the invitation was sent to; if you do not have an account yet, sign up with that address
- After you sign in, the invitation is redeemed automatically
- “Welcome to the team!” appears, and “Switch to this workspace” takes you straight in
If you sign up through the invitation link, LinkHarbor remembers the invitation and redeems it once you have confirmed your e-mail address and signed in for the first time. You can reach the new workspace at any time later with the workspace switcher in the header.
Possible errors when accepting
- “This invitation was sent to a different email address. …”: sign in with the invited account
- “This invitation has expired. Ask for a new one.”: ask the person who invited you to resend it
- “This invitation has already been accepted.”: you are already a member, switch via the header
- “This invitation does not exist or was revoked.”: the invitation was revoked or sent again
- “The workspace has reached its member limit.”: the workspace needs a free seat first
Redeem an invitation token
At the bottom of the “Team & Invitations” page there is the “Redeem invitation token” card. If the link in the e-mail does not work, you can paste the token there (the long string after “token=” in the invitation link) and click “Join workspace”. Here too, you must be logged in with the invited e-mail address.
Remove members
In the “Active Members” card each member has a “Remove” button. Admins and the owner can use it to remove any member except the owner and themselves. After the confirmation, “Member removed.” appears. The person immediately loses access to this workspace; their own personal workspace is not affected.
If you want to leave a workspace yourself, ask an admin or the owner to remove you.
Change roles
The owner sees a selection with Admin, Editor and Viewer next to each member and can switch the role directly. Everyone else only sees the role as a label. Details in Roles and permissions.
Transfer ownership
If someone else takes over the workspace, such as a client at the end of an agency project, you hand it over on the “Team & Invitations” page in the “Transfer ownership” card. Only the owner sees this card.
The person must be a member for this. On Creator Free and Creator Pro the only seat is already taken, so you can only transfer a workspace from Creator Agency.
- Invite the person if they are not a member yet, and wait until they have accepted the invitation
- In the “Transfer ownership” card, select the person under “Choose a member”
- Click “Transfer” and read in the “Transfer ownership?” dialog what changes
- Confirm with your password and click “Transfer ownership”
- The other person
- Becomes the owner and is then the only one who can change roles and hand the workspace on.
- You
- Stay on the team as an admin. Only the new owner can undo this, by transferring the workspace back to you.
- Subscription and billing
- Stay with the workspace. The billing details at Stripe do not change; the new owner updates them in the Stripe customer portal if needed.
After a downgrade
If the workspace drops to a plan with fewer seats, surplus members are removed. The owner is kept, then admins, then editors, then viewers, in each group those who have been there longest first. Pending invitations above the limit are revoked. See Cancelling and downgrading.
You might also find this useful
Nothing found?
Tell us what you need, and our support team will help you personally.