










































A ten-step walkthrough of the dashboard, pages and the Page Builder. How to start the tour, move through it and hide the hint.
The product tour shows you the most important places in LinkHarbor in about two minutes: the dashboard with your numbers, the pages list and the Page Builder. At each step it highlights the area in question and explains it in a small speech bubble.
Start the tour
- Automatically: on your first visit to the dashboard after signing up, the tour starts once by itself
- From the top bar: click “Start tour”
- From the avatar menu: click your initials at the top right and then “Product tour” – this works at any time
The “Start tour” hint in the top bar only appears in the first 14 days after sign-up, and only as long as you have neither finished nor hidden the tour. With the viewer role you do not see it, because the tour walks you through creating and designing a page. The X (“Don't show again”) hides it for good. This setting is saved in your account, so it also applies in other browsers.
Using the tour
- “Next” and “Back”
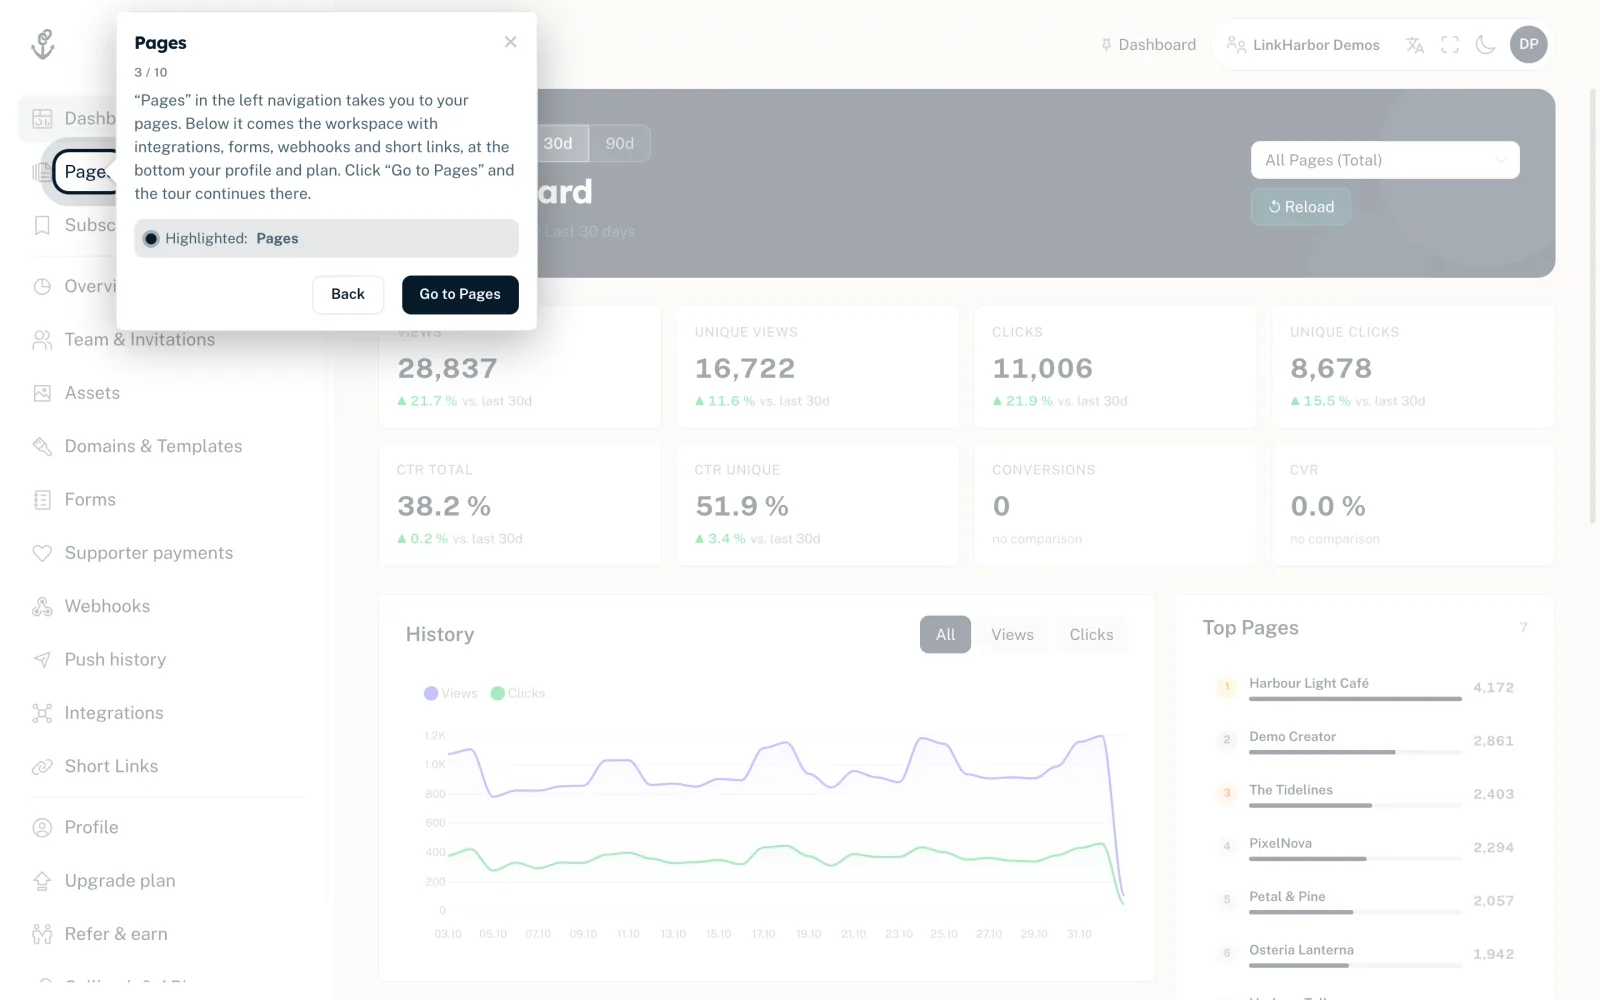
- Move between the steps. The counter (current step / total) shows where you are.
- “Go to Pages” and “Open the Page Builder”
- At these points the tour changes page. Click the button in the speech bubble and the tour continues on the next page.
- “Done” or “Got it”
- Ends the tour.
- “Highlighted: …”
- Shows which area is currently highlighted.
The ten steps
| Stop | Step | What it covers |
|---|---|---|
| Dashboard | Welcome to LinkHarbor | The period and the choice of a single page or the whole workspace |
| Dashboard | Your numbers | Views, clicks, click-through rate, conversions and the change from the previous period |
| Dashboard | Pages | Where to find your pages and the workspace in the navigation |
| Pages | New page | Creating a page with handle, title and template |
| Pages | The Page Builder | The buttons under each page and the way into the builder |
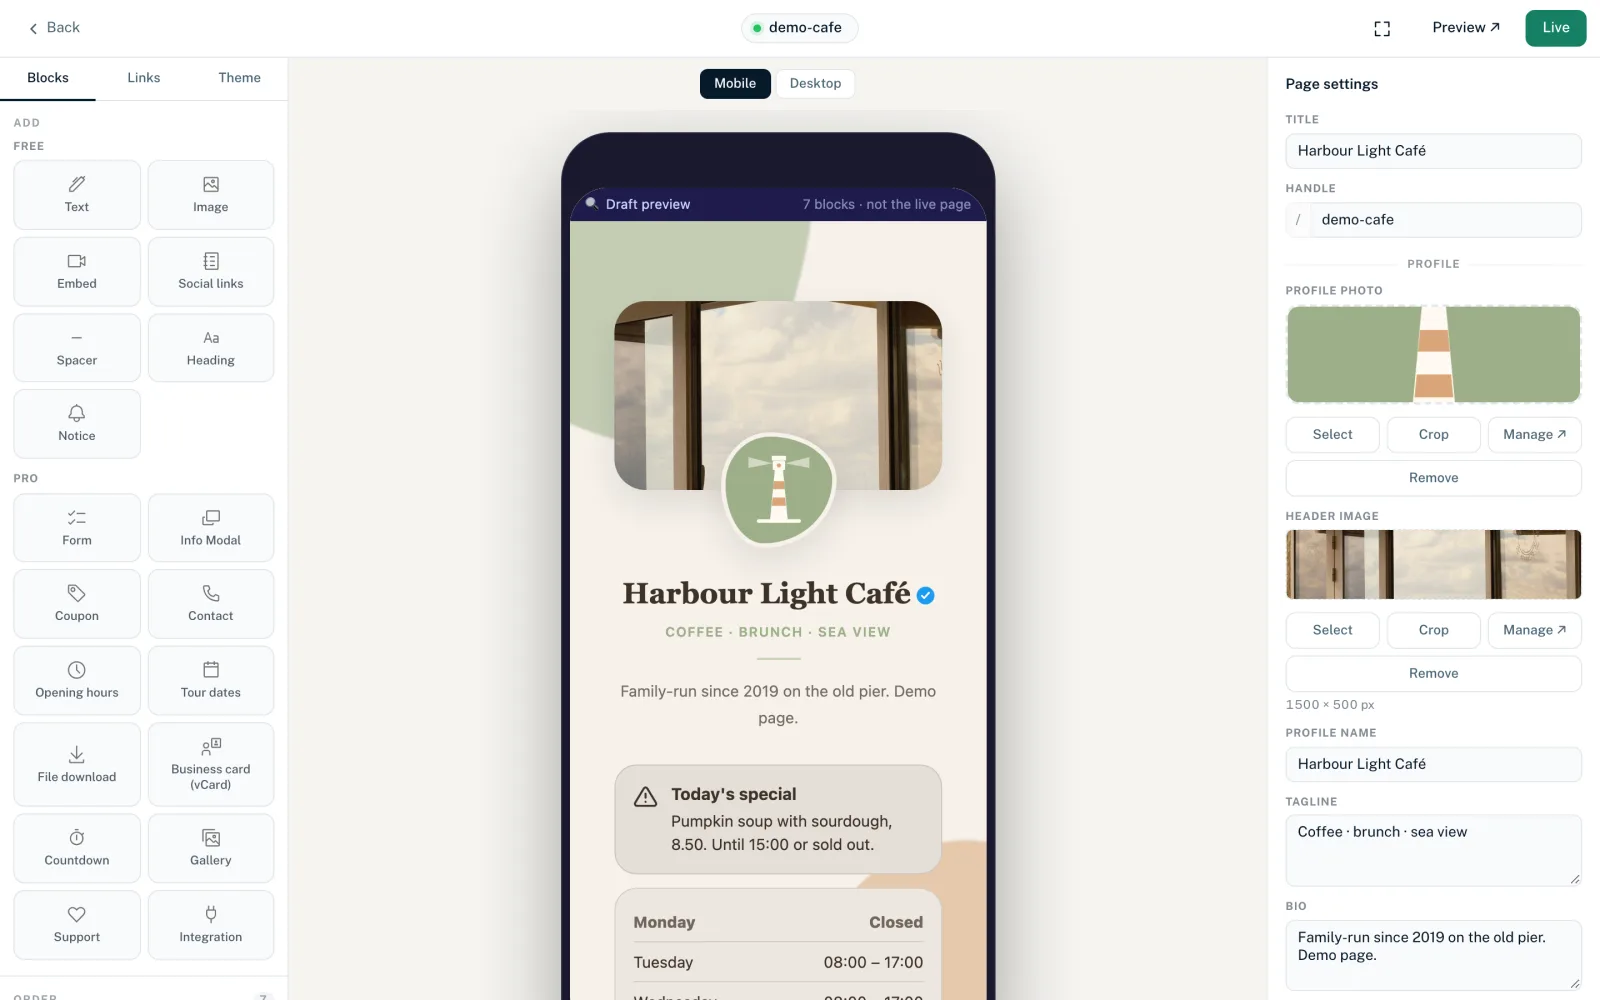
| Page Builder | Add blocks | Adding building blocks and sorting them by dragging |
| Page Builder | Edit a block | The right column: page settings, block content and link options |
| Page Builder | Design | Presets, colours, font, button style and background in the “Theme” tab |
| Page Builder | Publish | Putting the draft live with “Publish” |
| Page Builder | That's it | A pointer to integrations and how to restart the tour |
If you do not have a page yet, the fourth step is “No page yet”: create a page with “+ New Page”. The Page Builder then opens and the tour continues there.
After the tour
The tour is not a replacement for a guide – it shows you where things are. These articles help with the next steps:
You might also find this useful
Nothing found?
Tell us what you need, and our support team will help you personally.