










































Adding, arranging, hiding and deleting blocks, the Simple, Middle and Maximal layouts, and the block limits for each plan.
Blocks are the building blocks of your page: text, images, videos, social icons, opening hours, galleries and more. Every page also has a fixed Links block with your link list. This article explains how to add and arrange blocks, what the three layouts mean and which limits apply.
The “Blocks” tab
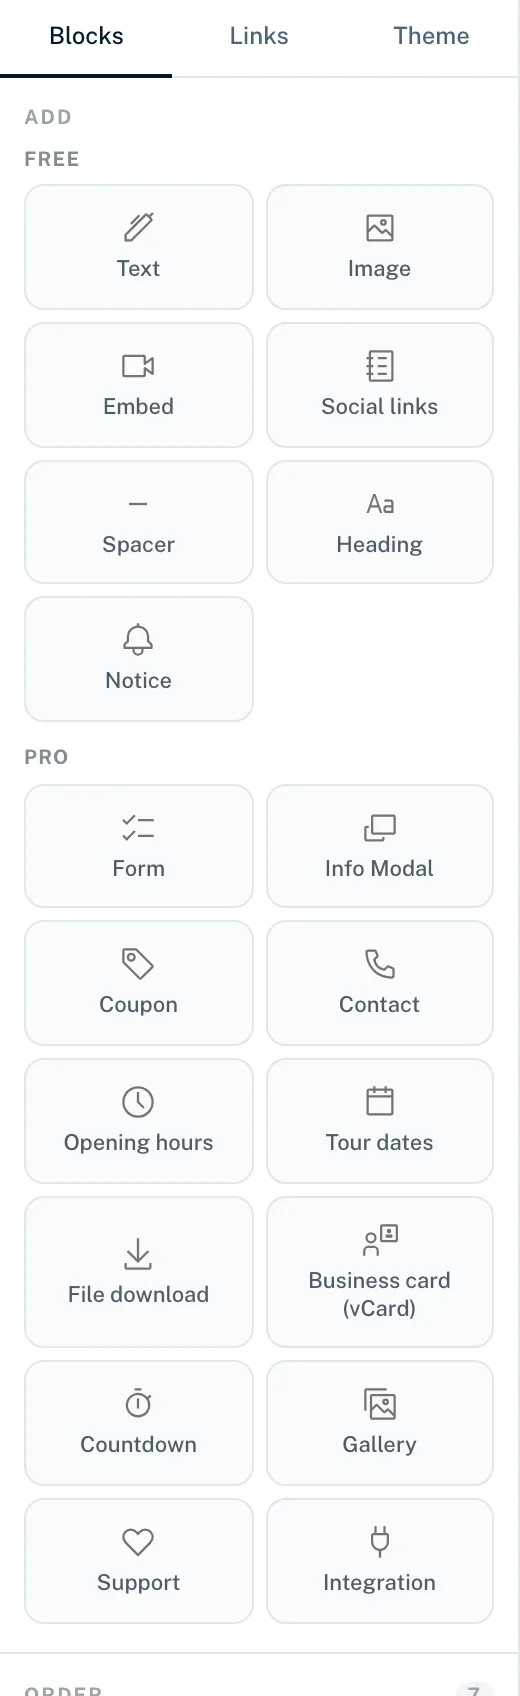
The “Blocks” tab is the first tab on the left in the builder. It has two sections:
- “Add”
- A grid with a card for each block type, split into “Free” and “Pro”. On Creator Free the Pro cards carry a “Pro” badge and the group shows “Pro required”. Clicking a locked card takes you to the plans.
- “Order”
- All of the page's blocks in the order they appear. Each row has a drag handle, an icon, the name, an eye to switch it on and off, “Edit” and a bin.
Adding a block
- In the builder, open the “Blocks” tab
- Under “Add”, click the card of the block you want
- The block is created with sample content at the end of the page and opened on the right for editing
- Fill in the “Content” section and choose a layout under “Display options”
- Publish the page so the block goes live
Three blocks behave differently: “Integration” first opens the “Add integration block” window, where you choose a connected integration. “Support” opens “Add ‘Support’ block”; there you choose your Stripe account and click “Add block”, see Support payments with Stripe. Both are available from Creator Pro; on Creator Free a click takes you to the plans. “Form” requires a form to exist in the workspace already; otherwise a note asks you to create one first.
All blocks at a glance
| Block | Plan | What for | Details |
|---|---|---|---|
| Links | All plans, fixed | Your link list | Free blocks |
| Text | All plans | Body text | Free blocks |
| Image | All plans | One image, optionally with a link | Free blocks |
| Embed | All plans | Video from YouTube, Vimeo or Loom | Free blocks |
| Spacer | All plans | Space or a divider | Free blocks |
| Social | All plans | Row of social media icons | Free blocks |
| Heading | All plans | Heading or section divider | Free blocks |
| Notice | All plans | Coloured notice with a time window | Free blocks |
| Contact | From Creator Pro | Address, phone, e-mail, website, WhatsApp | Business blocks |
| Opening hours | From Creator Pro | Weekly hours with exceptions and status | Business blocks |
| Business card (vCard) | From Creator Pro | Contact to save as .vcf | Business blocks |
| Coupon | From Creator Pro | Discount code with a copy button | Business blocks |
| Form | From Creator Pro | A form from your workspace | Business blocks |
| Info Modal | From Creator Pro | Button that opens a dialog with text | Content blocks |
| Tour dates | From Creator Pro | Dates with ticket links | Content blocks |
| File download | From Creator Pro | Download button for PDF, ZIP or audio | Content blocks |
| Countdown | From Creator Pro | Countdown to a point in time | Content blocks |
| Gallery | From Creator Pro | Image grid with a large view | Content blocks |
| Integration | From Creator Pro | Live widget from a connected platform | Live widgets |
| Support | From Creator Pro, with Stripe | Visitors support you with an amount of their choice | Support payments with Stripe |
Creator Free includes the 8 basic types: the fixed Links block and the seven blocks in the “Free” group. All other blocks are available from Creator Pro.
Editing a block
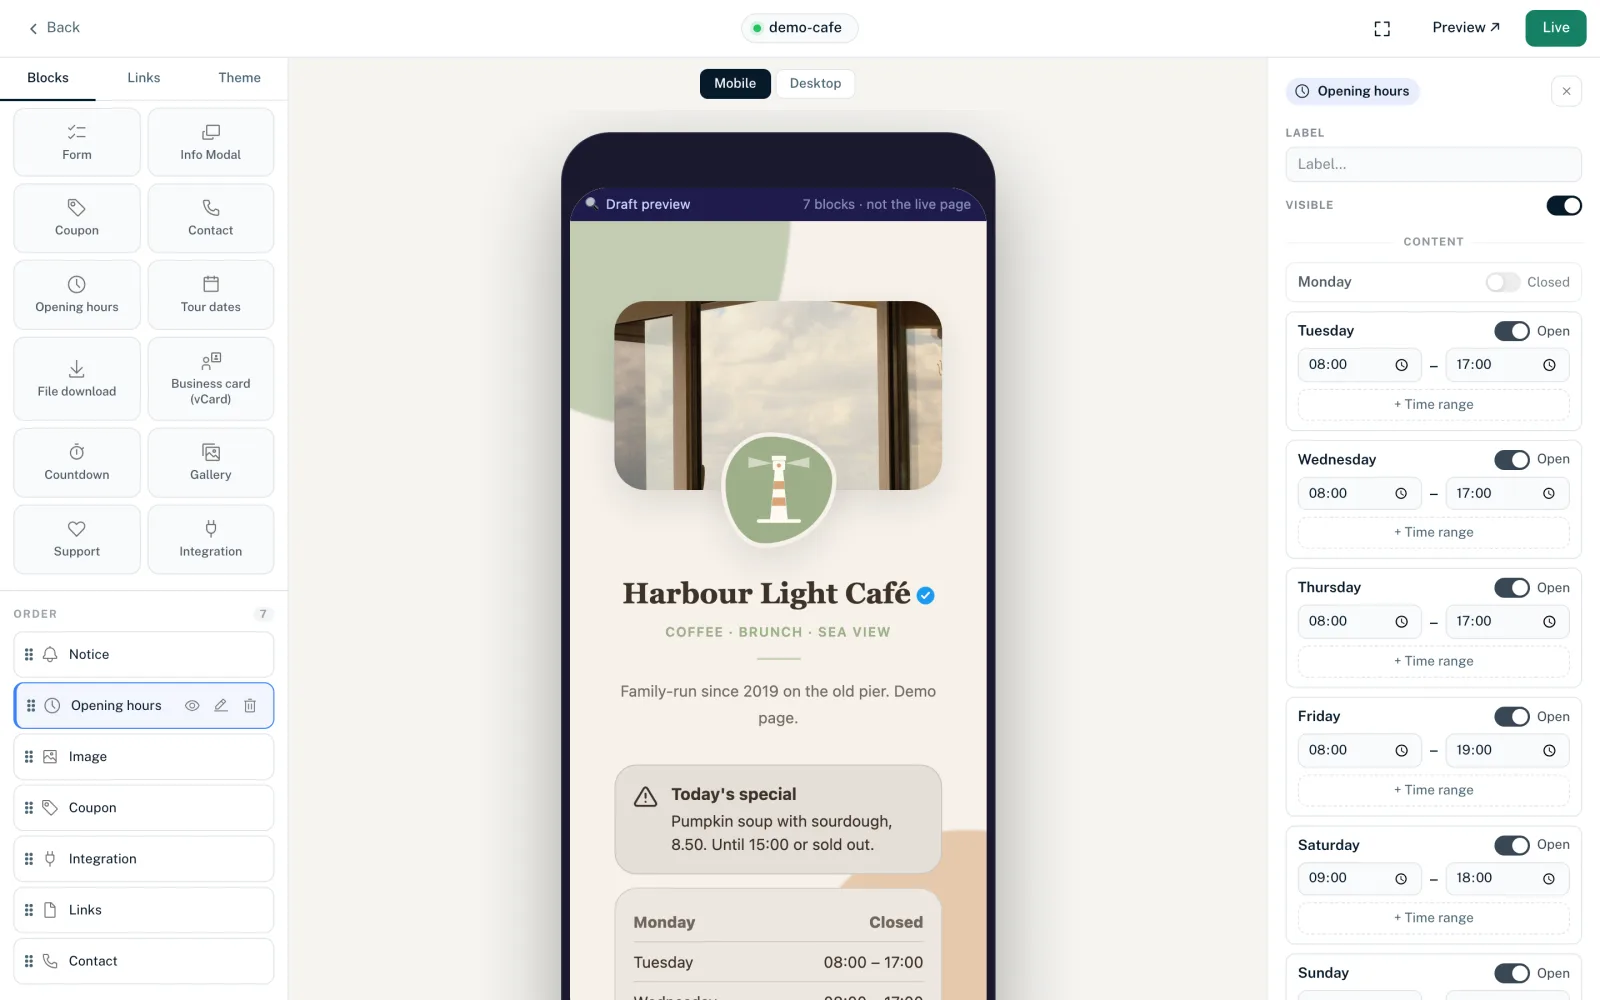
Click a block in the list or click “Edit”. The block editor opens on the right:
- “Label”
- Internal name, up to 180 characters. It only appears in the “Order” list and helps you tell similar blocks apart. Visitors do not see it.
- “Visible”
- Switches the block on or off, just like the eye in the list.
- “Content”
- The actual content, depending on the block type: text, image, address, dates and so on.
- “Display options”
- First the layout, below it the options that go with that layout: colours, spacing, corners, display switches.
- “Duplicate”
- Creates a copy directly below the original. If the block has a label, the copy gets the suffix “(copy)”.
- “Delete”
- Removes the block for good after asking you to confirm.
The Simple, Middle and Maximal layouts
Almost every block has three layouts. You can switch at any time; the content is kept.
| Layout | Description in the builder | Typical use |
|---|---|---|
| Simple | Compact, single line | Plain pages, many blocks one below the other |
| Middle | Standard with image + details | The usual case, with a heading, icon or image |
| Maximal | Hero/full width, all details | A block that should stand out, often as a card with its own background |
Which options each layout has is described in the articles on the individual blocks. Colour fields that follow the theme show “Default (from theme)”. If you have picked your own colour, “Reset to default” takes you back to the theme colour. Exceptions: the info modal and “Support” have only one layout.
Order, hiding, deleting
- Order: drag a block by its handle to the new position in the “Order” list. The order is saved immediately
- Hiding: the eye (“Deactivate”) hides a block without deleting it. Hidden blocks still count towards the limit
- Deleting: the bin opens “Delete block?” With “Delete permanently” the block and its settings are gone
- You can't hide, delete or duplicate the Links block
Limits per plan
| Plan | Blocks per page | Block types |
|---|---|---|
| Creator Free | 5, including the Links block | 8 basic types |
| Creator Pro | 25, including the Links block | All |
| Creator Agency | 50, including the Links block | All |
| Enterprise | Unlimited | All |
The fixed Links block counts too. So on Creator Free you can add 4 more blocks. Hidden blocks and copies count as well. Once the limit is reached, you see “You have reached the maximum number of blocks for your plan.” You can compare the plans in Plans compared.
Pro blocks after a downgrade
If you switch to Creator Free, Pro blocks stay saved but are shown neither on the page nor in the preview. The block editor then shows “Pro required” with the “See plans” button. After an upgrade they appear again.
The “Blocks” tab in the page editor
The page editor also has a “Blocks” tab. There you edit blocks as a JSON configuration. This view is meant for technically experienced users; for everything else the builder is the better choice. A changed order has to be saved there with “↑↓ Save order”.
You might also find this useful
Nothing found?
Tell us what you need, and our support team will help you personally.