












































After your first login, the wizard takes you to your first page in four steps: handle, template, platforms and links.
The “Set up your page” wizard appears after your first login as long as you have not created a page yet. In four short steps you choose your page's address, a template and your most important links. At the end, LinkHarbor creates the page and opens the Page Builder. If you are moving from another service, Switch from Linktree or other services helps as well.
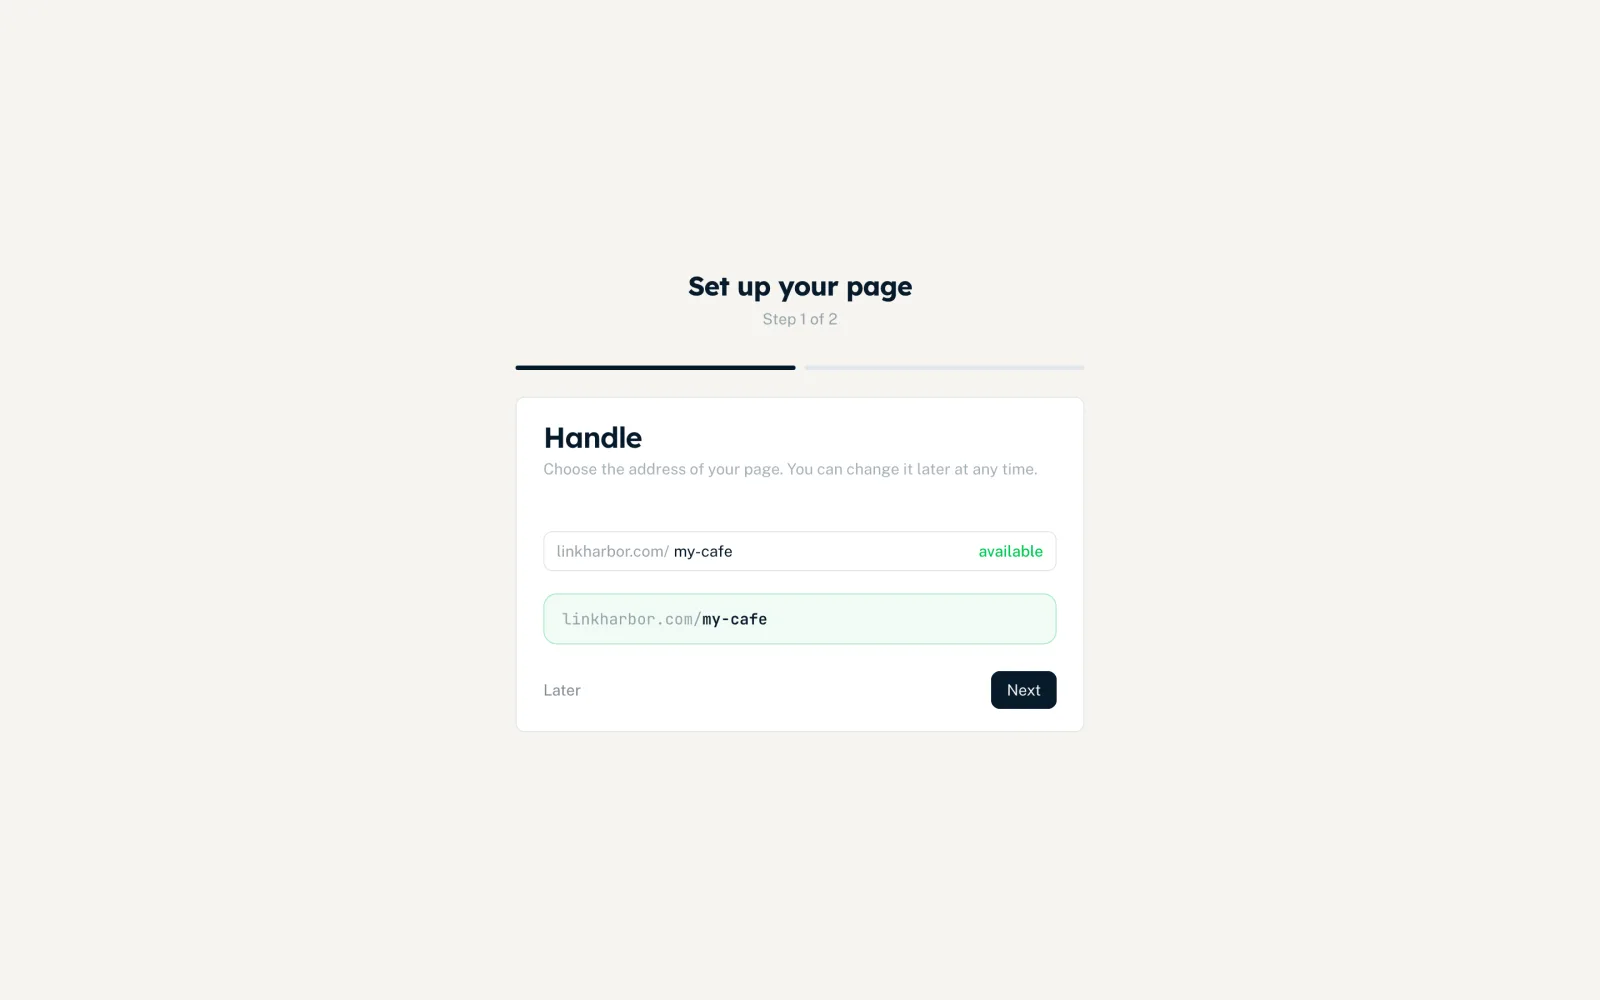
Step 1: Choose a handle
The handle is the part after linkharbor.com/ – in other words, your page's address. You can change it any time later in the page settings.
- Lowercase letters a–z, digits and hyphens are allowed, up to 64 characters
- Capital letters are converted to lowercase automatically, other characters are removed
- As you type, the wizard checks whether the handle is “available” or “taken”
- Below it you see a preview of the finished address
Some words such as help, login or pricing are reserved for LinkHarbor, see Create a new page. If you already entered the handle you wanted on linkharbor.com before signing up, it is filled in here. That does not reserve it, though – secure it by creating the page.
Step 2: Choose a template
The template is the basic framework of your page: “Choose a template for your page. You can switch it later in the builder.” In the wizard you see the templates included in your plan – on the Free plan these are Basic, Compact and Simple List. Each tile shows a preview image, the name and a short description; one click selects the template. You find larger previews of all templates later in the Page Builder, see Templates.
Step 3: Select platforms
Under “Select the platforms you use.” click everything you want on your page. The choices are sorted into groups:
| Group | Platforms |
|---|---|
| Social media | Facebook, YouTube, Instagram, TikTok, X / Twitter, LinkedIn, Pinterest, Snapchat, Twitch, Reddit, Threads, Bluesky |
| Apps & Messenger | WhatsApp, Telegram, Signal, Discord, Slack, Viber, LINE, WeChat, Microsoft Teams |
| Standard | Website, Email, Phone, Shop, Podcast, Blog, Calendly, Book an appointment |
| Other | A custom entry with a name of your choice (up to 80 characters): type the name into the “Link name, e.g. My shop” field and click “Add” |
Under “Selected” you see your choices and can remove individual entries with the cross. “Next” becomes active as soon as you have chosen at least one platform.
Step 4: Enter URLs
A field appears for each platform you chose. Enter the matching address there – for example the URL of your profile, your phone number or your e-mail address. Empty fields are skipped; the bin icon removes an entry.
- URL
- Must be a complete address, for example https://example.com. Otherwise you see “Invalid URL — example: https://example.com”.
- Phone
- A valid phone number, ideally with the country code.
- A valid e-mail address.
Click “Create page”. Phone and e-mail end up as icons in a social block, all other entries as links. LinkHarbor uses the handle as the title to begin with – you can change it in the Page Builder or in the page settings. The Page Builder then opens with your new page.
Skipping
You do not have to fill in every step. “Skip” works like this:
- If you have already entered a free handle, LinkHarbor creates the page straight away with the chosen (or the first available) template and opens the Page Builder
- Without a handle you land on the dashboard and create your page later with “+ New Page”. Until then, the wizard opens again every time you sign in
If someone has taken the handle in the meantime, “This handle is already taken.” appears when the page is created. If you click “Create page”, the wizard then jumps back to step 1 – choose a different handle there.
When the wizard stops appearing
The wizard counts as done as soon as you have created a page or accepted a team invitation. If you received an invitation to another workspace, the invitation is accepted first. If you did not see the wizard – for example after signing in with Google – simply create your first page under “Pages”: see Create a page.
You might also find this useful
Nothing found?
Tell us what you need, and our support team will help you personally.